Teaching Art is a feast into a of colour, line, texture, space and shape. By encouraging a visual exploration in my learning I love developing a creative approach to learning in the classroom. By encouraging different techniques and an understanding of art I hope to help students appreciate visual learning more. I hope you enjoy my uploads and can use them. Please contact me if you require any further information.
Teaching Art is a feast into a of colour, line, texture, space and shape. By encouraging a visual exploration in my learning I love developing a creative approach to learning in the classroom. By encouraging different techniques and an understanding of art I hope to help students appreciate visual learning more. I hope you enjoy my uploads and can use them. Please contact me if you require any further information.
A detailed project looking at developing a Still-life project looking at composition, rule of thirds, different techniques for each object with different art styles.
Students firstly, study what is a Still-life and write up a definition for this.
Students then look at what different styles in Art before Modern Art.
Students look in detail at Dutch Still life and the Vanitas still-life.
There is also some information on the Post Impressionist artist Paul Cezanne and his style of brushwork.
A focus on what is still life?, then looking at Pop Art and what is pop Art? Students then answer questions on two Pop Artists: Michael Craig Martin and Patrick Caulfield. Students practise making a background on Pop Art in their sketchbook and answer the questions.
Students develop their own Still-life and are told to bring in objects for their Surreal mixed media Still-life and their are examples of this. Students learn to compose a layout for their still-life final using a Viewfinder and the rules of third, Fibonnacci rule to help them construct a composition. Students develop their own Still-life and are told to bring in objects for their final arrangement.
The emphasis is then to take them through different techniques with each object they brought to class. The techniques included in the project are: Wax and Scratch, Paper collage, Pop Art hard edge colours and outlines, Palette knife painting, Pencil shading and Pen drawing.
There are finally student examples of final outcomes for this project to support the outcome.
The powerpoint first of all gives you some techniques to use with paper and students to make a sample board of the techniques.
Homework task: Zentangle …see powerpoint example
Students then go on to draw out an insect and there are symmetry templates for you to use to develop insects.
There are also lots of different resources and pictures of insects to use.
Further task is then to build the paper craft techniques on the pen drawing and to make your relief paper insect. There are examples of different paper techniques and samples to develop.
**Learning Objectives **
Using the topic given insects/birds the aim is to develop their paper art skills and to begin to make an insect. Also, to use skill of symmetry and practise drawing skills and to build a 2D relief insect using paper creatively.
• To learn how to do various paper art techniques and develop ability to manipulate paper.
• To explore a number of different paper craft activities, there are slide examples of techniques.
coiling paper
folding paper
spiraling paper
layering paper
scoring paper
embossing paper
twisting paper
rolling paper
curling paper.
• To EXPLAIN HOW TO carefully draw out insects using the symmetry insects as a guideline.
• To cut out the shapes of insect drawing carefully
• To explore paper techniques.
**Resources **
Large square of re-cycled paper to paste the paper sample techniques on
Glue – pritt stick and pots of glue
Pencils, Scissors
Magazine paper to use to make insects, Pens to draw with
Tracing paper to help with symmetry drawing
**ACTIVITY OBJECTIVES **
To make a sample board of different effects one can achieve when using paper as an art form.
To develop a range of skills to use when working with paper artists and craftsman
To learn to coil, scratch, spiral, fold, bend, cut and lift, twist, emboss, layer, cut, roll and manipulate paper
To learn about different paper artists and craftsmen who work with paper as an art form.
To learn to use paper and to craft various shapes and folds
To learn to build a paper insect using the paper craft techniques, that is, to fold, score, layer, cut, emboss and coil a paper insect
To do homework task: Zentangle insect.
Examples of artists on the Powerpoint to help you to build a 3D paper sculpture with techniques
Also various templates to help you to draw an insect - especially to develop your ability to use symmetry.
A Still-life project basic one page 5 min scheme with Dirt and Weekly plan.
See the Still-life project on TES.
This is an overview of acstill-life project which entails drawing in different media a still-life composition. Below are a list of all the lessons.
ART THEMES before modern art. What? Modern Art? and Still-life?
Composition? Rule of thirds. Organising still life. Paper prepare: Black/brown paper: newspaper/music, Draw Still-life in line.
3 Exploring pencil mark-making techniques. Pencil tonal study of geometric shapes
4 Pop Art discussions – To make a 2D coloured flat shape area of composition
5 Explore with Oil pastel: Using oil pastel detail
6 and 7 Exploring pen mark-making techniques. To draw over a Cubism Collage using a biro pen
8 Exploring Charcoal techniques Drawing on black paper using white chalk/charcoal.
Research Artist study on Robert Raushenberg library
10 – Evaluation of still-life drawing project
11, 12 and 13 Mod roc Relief
14. Evaluation
This powerpoint is about drawing in charcoal and white chalk on black paper. Students collage a black piece of paper on their paper and then draw a part of their still-life using this technique.
The overall Learning Objectives are:
To develop my understanding of Art and pre-modern art and the meaning of a Still-life drawing.
To develop my observational drawing skills.
To create a Still-life drawing learning to draw carefully from observation with a viewfinder
To learn how to compose a composition using the rule of thirds and developing an understanding of the Golden Mean AND COMPOSITION PRINCIPLES
To develop a further understanding of Pop Art and do a flat colour paper shape detail in your drawing.
To develop my knowledge of the elements of art: lines, shape and form
To develop techniques in different media in my drawing and to explore markmaking of pen, pencil, oil pastel and charcoal.
To practise my observational drawing skills in the following techniques: oil pastel, drawing with a bro pen, using chalk and charcoal
To develop my knowledge of Robert Raushenberg (Pop Art) and practise drawing over a light printed surface with pencil.
To explore developing a relief surface of an area of my still -life drawing and develop this in mod roc technique
To develop an understanding of the work of Joan Miro by looking at the example ‘The Harlequin Carnival’ and describing what you see.
To draw out a cupcake consolidating what you learnt in class in pencil.
To make a magical creature out of a splash of coffee.
To trace this and to colour this in as best you can.
To then paste your magical creature on the cupcake drawing and to creatively colour this in.
To evaluate your outcome.
To take a photograph of your sheet of A4 paper and to upload this to the Shared drive X.
Task 1
Write for a Heading ‘Surrealism’ on A4 paper Look at the picture by Joan Miro on the right called: ‘ The Harlequin’s Carnival’. This is a typical Surrealist picture.
Describe this work on the paper, describe what you see in one sentence. Write 2 or 3 lines on your paper about this painting using descriptive words.
Task 2
On the piece of A4 paper carefully draw a cup cake. Size about the normal size of a cake place this at the bottom of the A4 paper
Follow the steps on this slide to help you to draw one cupcake.
Draw this lightly with pencil like the examples given on the right.
Task 3
Make a very little coffee, some black coffee in a cup. Wait for this to cool before using this. (You can make the coffee by putting half a cup of water and mix a spoon of coffee with this.)
Splash strong cold coffee on another piece of paper – ( not the drawing paper of cupcake)
When the coffee splash is dry draw in and around this splash in pencil and make a fantasy random magical creature like the examples on this slide and the next three slides
Task 4
Once you have your coffee splash and have drawn around this.
Try to copy this out again, that is, put a piece of white paper over the splash you can use your window light to help you trace it
Colour the tracing in.
Task 5
Cut this out. You have now made a magical creature!
You could outline this darkly with your pencil.
This is the style of Joan Miro –who uses flat shapes. You now need to colour in with flat colour shapes (that is, no shading!) . See examples. You can use pencil crayons and felt tips if you have. If you do not have this just use your pencil to colour this in.
Paste this on your cupcake
Decorate your cupcake creatively with magical creatures.
Task 6
Creatively finish colouring in your cupcake as best you can. You can collage – stick coloured papers and decorate.
Paste this on your A4 sheet with task 1.
Complete a short evaluation. Write next to your cupcake artwork. Telling me what went well and about any issues you had.
Take a photo of your A4 page work.
Save this giving the jpg. your name
Upload this to the Remote Learning Work load.
You will find your class with your name.
Upload this to your name please
This is a very successful drawing lesson to build confidence with drawing. It can be used at any level as skills are on invaluable. It can be stretched over two lessons.
I have a shoe box of little ornaments wrapped in fabric and tied up with tape that I use for this lesson and over the years this is one of my favourite lessons.
I finally tried to make a powerpoint and hope you enjoy !
There is a drawing starter exercise
Then the fun begins
Objectives
To explore observational drawing techniques: blind drawing and contour drawing
To investigate how to capture techniques (markmaking) when drawing
To build confidence in capturing a form with line by using different styles when drawing: gestural drawing and pattern drawing
To develop a design from observational details
There are 17 drawings to make … and each slide gives you the instruction and an example of drawing
Resources
A3 cartridge
sharp 2B pencil
small objects to draw wrapped to start
oil pastel each
Fine-liner each
ruler
pencil rayons
small bit of tracing paper cut in squares ( size of unit for repeat)
starting with the following
. TOUCH DRAWING
Draw through TOUCH ONLY
Feel the object under a cloth draw the object – and try to imagine the shape, texture, and form
Try to draw and outline only.
2 minutes
BLIND DRAWING
Draw with CONTINUOUS LINE and BLINDLY 3 min
Draw the object and draw blindly. DO NOT LOOK AT YOUR PAPER as you draw.
Instead imagine your pencil as a contour ( an ant crawling on the object) exploring all the edges, outlines, shapes, textures and details of the object.
2 minutes…
Follow the slides
There are pictures of student examples.
Success criteria
The line and markmaking quality is MORE important than accuracy
This gives students a realisation that drawing is about lines and marks.
Students given examplesof nature pictures and to create a repeat pattern from a pencil drawing of these pictures Pictures of nature for students to draw from and then how to make a repeat unit from this drawing
Showing how to make a mirror repeat, half-drop repeat, straight repeat and diagonal repeat.
Resources needed: Tracing paper, pencils, calico fabric cut in squares, ink rollers, waterproof inks,
Step by step breakdown of design and printing processes
Guidelines on how to use polyprint. Students make a repeat pattern on fabric and then sew this into a cushion
There are lots of student examples to support
Examples of student work
Success Criteria
Simplifying drawing into a line pattern and making a repeat unit,
Choosing a colour combination for repeat unit and drawing out the unit on fabric
Carefully rolling out the colours and layering the print from light to dark.
Strong contrasts of colour
Careful accurate layering of colours.
These are a set of 6 sheets which can be laminated for classroom tables to help students with writing about Art.
These are lists of descriptive words linked to the Elements of art and the Principles of design. These will help students to be able to write about artworks and help to broaden vocabulary.
There are also words to help with writing at GCSE and support with writing under the GCSE Assessment Objectives as well.
There are also sheets to help with writing frames to support weaker students when they analyse and write about their artworks.
This can be used with Key Stage 3, GCSE and A-level
Leaving these on the desks in the classroom support literacy learning and help students with vocabulary.
This is a key stage 3 project where students do a polyprint on fabric using printing inks. This is a short 6 week project but could be developed to incorporate embellishments and sewing skills to fabric. I did this with year 8 and it took 6 weeks. Student enjoyed the outcome and it could have been made into a cushion for each student but we made a class fabric wall hanging. (There is a second Powerpoint in a Bundle which has all the pictures used for students to work from - A-Z of nature pictures)
Artists used: Angie Mitchell and Ernst Haeckel
Resources required
Polyprint blocks
Printing ink
Rollers
Tables to roll out on
Fabric square per child
Paper for test prints
Research sheet for drawings and artist research.
Project schedule 6 weeks
The resources for the students to work from. Each student chooses what they would like to draw.
The steps to take while making the print and examples of student’s outcome.
Students begin by researching Angie Mitchell and Ernst Haeckel and make up a sheet with these two artists and their drawings. The drawings they do of one of the pictures of the slide pictures of animals and bits of nature from A-Z. Students choose which animal or fish or plant they would like to draw. Students spend time doing a detailed drawing and design a border pattern for this work in black and white.
Success criteria of drawings
To use fine lines and to capture quality detail
To concentrate on negative and positive shapes
To develop a border pattern from nature around the drawing
To try to layer up your drawing with foreground and background shapes
The students drawings are then photo-copied and transferred to the polyprint block. Students use the photocopy to press through onto polyboard. The students are given a square and a strip of polyprintboard . Students first of all experiment printing on paper with their design and border. Students can do a black and white print or do a polyprint print of two colours overlaying their inks.
The slide presentation gives you also opportunities for reflection and evaluation of outcome at the end.
I have presented my artists in my book
I have compared the works of 2 nature artists
I have written a short paragraph on the style of artists
I have a careful line drawing of my subject
I have created my own artwork based on my research of subject colour
I have a plan for my print design and have written about relief printing
I have tested working with polyprints
Student outcome is a wall-hanging and we sewed all the students outcomes together to make a fabric collage of squares.
Students will create their own open window painting after been inspired by Henri Matisse
Students to write about Henri Matisse 'The open window ’ and understand what is Fauvism
Easy student examples - outcomes of watercolour designs
Clear step by step drawing of the windowdesigns and students left to add in own detail to make it more interesting
Students gain confidence in drawing using the simplified shapes of Fauvism and practise watercolour techniques
A powerpoint outlining some tasks for a Key Stage 3 project on Tim Burton. In this project there are a number of skills, pencil drawingwith pen work, chalk and charcoal drawing on black paper, making a black and white silhouette cut out, collaging harcoal drawing onto bottle and painting bottle, further developing a character on a bottle and making a wool paper character. This also has a few quizzes and student examples of work to support the tasks.
Starting with presenting a title page for Tim Burton and copying some of his scenes by practising pencil tone and mark making. Layering pencil and black pen in drawing when copying Burton’s work Photocopy examples for students to work from to print off.
Then developing a cut out in black paper looking at the strange, Gothic type black and white silhouettes of some of his scenes and making a page on his settings using black paper and cut-outs.
The slides give a number of the silhouette type scenes for students to use for inspiration. Further developing a character drawing and students are to look at the number of different slides and these could be printed off for students and letting them develop their own character. Some of the You tube film clips are linked on the slides as well. Students draw out the character and then colour this in.
Tim Burton’s scenes are often dark and atmospheric and this is an ideal opportunity to practise drawing with white chalk, charcoal or black soft pastel on black sugar paper and to do a drawing of one of his black and white characters. There are some examples to use to copy from to support the students learning. This black and white scene can further be photocopied and collaged onto a bottle. There is also an extension task to make a head on a wine bottle in paper-mache and lots of inspirational examples of student work
Another fun task is to play with wool and paper and to make a rolled animal using newspaper in rolls and then wrapping wool around this and to bend into shape. This can further be embellished by adding bits and bobs like buttons, braid and other decorative details to develop a character type animal which has been inspired by Burton.
There are a few quizzes and homework tasks as well.
Looking at the work of Peter Blake- there is a page of information and questions on his work.
There are examples of his alphabet artworks and cover designs for Famous Music artists.
Students are inspired by his work of collage, photography and free drawing style.
Task 1. Students make their own Pop art alphabet style and this links to Graphics and students can look at Pop art letter styles.
Task 2 Students are asked to find their own popular things linked to each letter of the alphabet. Students are asked to make their own alphabet using the similar ideas as Peter Blake, but to focus on trying to create a favourite thing for each of letter of the alphabet. Students then put these ideas on an A4 or A3 paper. There are examples of different alphabets and student examples of final outcome.
Task 4 Students play with letters and take one letter and make this in various different designs This is a Graphics exercise and students learn to play with one letter and styles.
Task 3 Students put a collage together in the style of Peter Blake. Students should use lettering/ graphics and link this to their own favourite things and then make a collage of this in a 26cm square shape. students can use pictures from magazines , comics and newspaper and cut out and collage.
Task 5 Students should creatively now make their own album design. There are formats for the CD covers to use as a template. Presentation gives examples for inspiration of Peter Blake’s alphabet designs and album covers and looks at some of his famous Album cover designs. Students need to make their own CD cover of their favourite musician. Students to use a variety of media for final task.
In the first part of the powerpoint students are asked to listen to pieces of music and to formulate slogans from them.
Students then are asked to do a critical analysis of the work of Banksy by selecting one of his works and answering questions.
After this students are asked to copy a picture of Banksy and then make their own collage of his work using magazines and newspapers.
The theme of their poster is on the pandemic.
We will be learning:
To create a poster collage in the style of Banksy that describes the pandemic occurring and linking this to the UK
To use magazines, newspapers and pictures and to make a collage of these to create a poster.
To make a slogan, drawing the lettering or finding letters in magazies or newspaper.
Success Criteria
Your poster must include the following:
A key phrase or work linked to the pandemic
Two image that links to what is happening in the UK
or something that is key in the NEWS.
It should have graffitti style lettering and pencil work
Accurate shape outline
Good use of negative space
Link between font style and theme
Clear placements/readable
year 7
Diagnostic for year 7
Celtic letters
Paper mache plants
Clay Gargoyles
year 8
Cubism
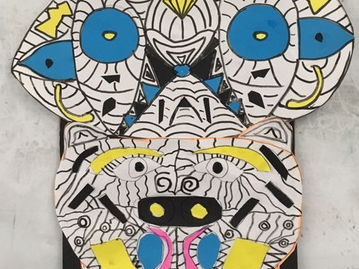
Making Insects - paper craft
Modern Movements - collage and paint
Surrealism - painting project
These resources support a study on Hundertwasser.
This helps with making an artist analysis of his work, interpreting a photo you take of houses into your own style and making a coloured drawing
Secondly taking this into a clay tile.
This is the final part of a series of Still-life lessons where students do drawings in different techniques and then make a mod-roc outcome.
In this powerpoint the students go to a computer room and do a presentation on the artist LOUISE NEVELSON and then make a mod-roc outcome. Steps are showing how to make the mod-roc relief and criteria for success with this medium.
Students then evaluate their mod-roc outcome by doing a tonal drawing of this and reflect on the outcome
Computer room research: Louise Nevelson - students write and answer the questions and resource information on this artist.
After making the mod-roc students evaluate their mod-roc outcome and do a drawing of your outcome and as a group discuss how they will as a group present their own work like Louise Nevelson.
Learning Objectives:
To explore developing a relief surface of an area of my still -life drawing and develop this in mod roc technique
To build a mod –roc outcome looking at relief techniques
To in a group build your Modroc into a standing tower with the rest of the group.
Do a study of the artist Louise Nevelson and present her work by doing an artist study of her work.
Complete the project by doing an evaluation of their mod-roc relief sculpture and do a pencil drawing of this
**What are the Learning Objectives for this project in Art? **
Students learn from examples and a clear understanding to totem poles is explained visually in slides, also different video clips about Totem poles and their story telling. There are slides which give a background to totem poles. Lots of symbols for different animals given on separate slides which could be used ot make the totem pole.
Students through the research into totem poles will gain an appreciation of how religion and spirituality holds in Native American cultures.
Students will be able to communicate experiences, moods, and stories and reflect on their own family history and family tree in a group project.
Students to create images using the elements and principles and design their totem imaginatively.
Using pictures of animals - students can stylise and create a symmetry outcome to use in the building of their animal/sun/bird/man for their totem pole.
Each student completes a different part of the totem pole and students need to work in teams
Students create images in response to objects from a variety of cultural contexts as students look at and watch various ‘You Tube’ video links about the Totem pole story telling.
Students demonstrate awareness of Pacific Coast heritage
The slides give a sequence of classroom activities leading to the making of a cardboard totem pole.
Students use recycled materials and build their animal/bird/sun/man they designed.
There is an emphasis on coloured paper and pasting this into the cardboard and building up the structure.
Students will complete the following:
**Teamwork: **Complete a group totem pole.
Graphic Design: Design a group/tribe logo.
Independent Research: Interview a Family member and research family history
3D Sculpture Design: Design a totem sculpture that represents your family history in 100 years time.
Recycling materials: Students use recycled materials and construct a standing Totem.
Students can embellish and decorate their totem with coloured paper cut outs and black pen line work.
This is a lesson for year 7 who are learning to shade and to create a 3D form. This is the start of a Scheme of work (Powerpoint one) where students draw a pebble and then eventually make a tile in the shape of their pebble and design a relief surface based on Hundertwasser.
There are three powerpoints on Tes in a bundle linked to this unit of work or you can use it as a drawing exercise to learn to shade 3D forms.
This is a short example showing different steps to get a 3D sphere form and using tonal values to develop this form. There are exercises on markmaking and how to create a tonal value. There are the main breakdown of what is needed in a sphere in tones: Light, light grey, middle grey, dark grey and black with reflected light. There are examples of showing how to shade in the direction of the form.
Learning Objective was:
To create a presentation on an A3 sheet of your observation drawing studies showing volume drawing of pebble
To learn to draw 3D geometric shapes and firstly practise mark making and a range of tones in media: charcoal.
To develop observational drawing techniques.
This follows with Powerpoint Two and Three where students then begin to :
Present preparatory work on a page and to plan a design for clay tile.
Develop painting style like Hundertwasser (study the style of this artist) and use watercolours and understand what is a style in Art.
To complete a clay tile and paint design on tile.